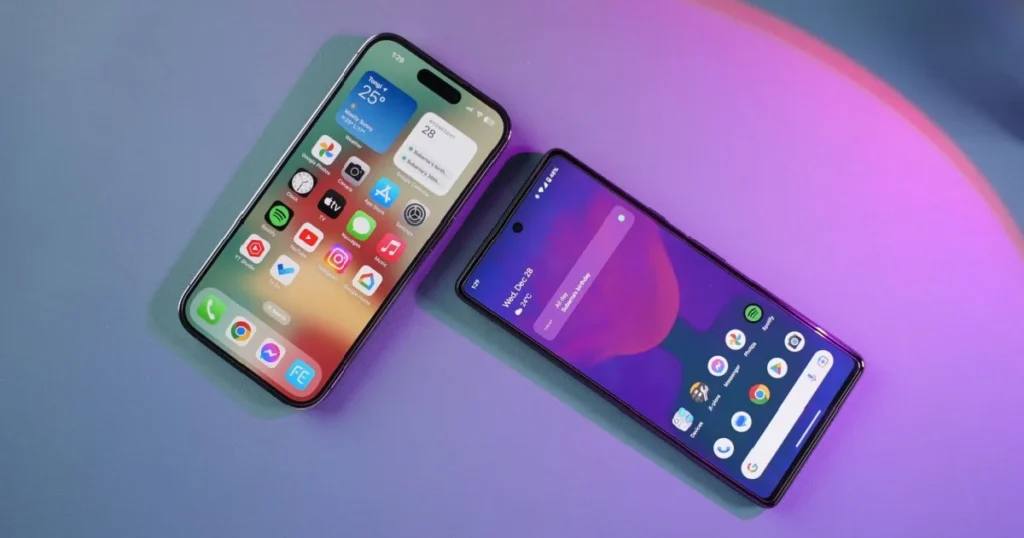
Are you ready to embark on the exciting journey of switching from Android to iPhone? You’ve got your new iPhone in hand, but there’s one critical task that stands between you and fully enjoying your new device: transferring your contacts. In this comprehensive guide, we will walk you through the process of how to transfer contacts from Android to iPhone. Whether you’re a tech enthusiast or a novice, our step-by-step instructions and expert tips will ensure a seamless transition. Say goodbye to the worries of losing your valuable contacts during the switch – we’ve got you covered. Let’s get started on this contact migration adventure!

Table of Contents
Why Is Contact Transfer Crucial?
Before diving into the methods, let’s take a moment to understand why transferring contacts is crucial. Your contact list is a treasure trove of valuable connections. It includes not only your friends and family but also business associates, colleagues, and important acquaintances. Losing this information during the switch can be a significant setback. That’s why ensuring a seamless transfer is essential.
Now, let’s explore the various methods you can use to move your contacts from Android to iPhone.
Method 1: Using Google Account
Setting Up Your Google Account on iPhone
- Go to “Settings” on your iPhone: To begin the process, unlock your new iPhone and go to the “Settings” app on your home screen.
- Select “Passwords & Accounts”: Scroll down and tap on “Passwords & Accounts” to add your Google account.
- Add Your Google Account: Tap “Add Account” and select “Google.” You will be prompted to enter your Google account credentials. Fill in your email and password and proceed.
That’s it! Your Google account has been successfully connected to your iPhone. Now, let’s move on to syncing your contacts.
Syncing Contacts with Your Google Account
- Open “Settings” on your iPhone: Go back to the “Settings” app on your iPhone.
- Navigate to “Contacts” and Tap “Accounts”: Scroll down until you see “Contacts,” and then tap on it. You’ll find your Google account listed here.
- Enable the “Contacts” Toggle: Tap on your Google account, and you’ll see a list of sync options. Enable the “Contacts” toggle switch.
Your Android contacts will now sync with your iPhone, and you’ll have all your important contacts readily available.
Method 2: Using iCloud
Backing Up Android Contacts
Before transferring your contacts to your iPhone, it’s a good practice to back them up on your Android device. Here’s how you can do it:
- Open the “Contacts” App: Launch the “Contacts” app on your Android device.
- Access the Menu: Tap the three horizontal lines or the menu icon, usually located at the top-left or top-right corner.
- Select “Settings” and Choose “Export”: In the settings menu, look for an option like “Export” or “Export Contacts” and select it.
- Choose the Export Format: You’ll be prompted to choose the export format. VCF (vCard) is the most commonly used format for contacts. Select it.
- Save the File: Once you’ve selected the export format, tap “Save” or “Export,” and the contacts file will be saved on your device.
Now that you’ve backed up your Android contacts, let’s move on to importing them to your iPhone.
Importing Contacts to iPhone
- Transfer the VCF File: First, transfer the VCF file you created on your Android device to your computer. You can do this by connecting your Android device to your computer using a USB cable or by emailing the file to yourself.
- Access iCloud on Your Computer: Open a web browser and go to the iCloud website. Sign in with your Apple ID.
- Access Contacts: Once you’re logged in, click on “Contacts” to access your iPhone’s contact list.
- Import the VCF File: In the bottom-left corner of the Contacts window, you’ll find a gear icon. Click on it and select “Import vCard.” Locate and select the VCF file you transferred from your Android device.
- Wait for the Sync: Your contacts will now be imported into your iCloud account. Depending on the number of contacts, this could take some time.
Once the syncing process is complete, your Android contacts will be available on your iPhone.

Method 3: Using a Third-Party App
Using a third-party app can simplify the contact transfer process. Here’s how:
Choosing the Right App
When selecting a third-party app, it’s crucial to choose a reputable one. Look for apps that have a lot of good reviews and ratings. Some popular options include “Copy My Data,” “Move to iOS,” and “SHAREit.” Download and install the app on both your Android and iPhone devices.
Transferring Contacts with the App
The steps to transfer contacts using a third-party app may vary depending on the app you choose. Generally, the process involves the following steps:
- Open the App: Launch the app on both your Android and iPhone devices.
- Follow On-Screen Instructions: You can follow on-screen instructions provided by the app to help you with the transfer procedure. Typically, you’ll need to select your source device (Android) and target device (iPhone) and follow the prompts.
- Wait for Transfer: The app will transfer your contacts from your Android device to your iPhone. This may take a few minutes, depending on the number of contacts.
Using a third-party app can be a quick and efficient way to transfer your contacts, especially if you’re not comfortable with manual methods.
Common Issues and Troubleshooting
Duplicate Contacts
Sometimes, after the transfer, you might find duplicate contacts on your iPhone. To resolve this issue:
- Open “Contacts” on Your iPhone: Launch the “Contacts” app.
- Tap “Merge Contacts”: Look for an option like “Merge Contacts” or “Find & Merge Duplicates” within the app. Tap it, and your phone will automatically merge duplicate entries.
Missing Contacts
If you notice that some contacts didn’t transfer, follow these steps:
- Double-Check Your Settings: Ensure that both your Android and iPhone devices are connected to the internet during the transfer process.
- Use an Alternative Method: If some contacts still don’t transfer, consider using an alternative method or contacting customer support for the app you’re using for assistance.
Error Messages
Common error messages during the transfer process may include network issues or incompatible file formats. To resolve these issues:
- Ensure Stable Wi-Fi Connection: Make sure both devices are connected to a stable Wi-Fi network during the transfer.
- Verify File Formats: Check that your contact files are in a compatible format for the chosen transfer method.
Method 4: Manual Entry
Exporting Contacts from Android
To manually export contacts from your Android device, follow these steps:
- Open the “Contacts” App: Launch the “Contacts” app on your Android device.
- Access the Menu: Tap the menu icon (usually represented by three horizontal lines or dots).
- Select “Settings” or “Manage Contacts”: Find and select an option like “Settings” or “Manage Contacts” in the menu.
- Choose “Export” or “Export Contacts”: Look for an option to export contacts and select it.
- Select the Export Format: Choose the export format (usually VCF or vCard) and proceed.
- Save the File: Your contacts will be exported as a VCF file, which you can save on your device or transfer to your computer.
Importing Contacts to iPhone Manually
Manually importing contacts to your iPhone involves sending the VCF file to your iPhone via email, messaging apps, or other methods. Once you’ve received the file on your iPhone, follow these steps:
- Open the Email or Messaging App: Locate the email or message containing the VCF file on your iPhone.
- Tap the VCF File: Tap the VCF file to open it.
- Import the Contacts: Your iPhone will recognize the VCF file as a contact file and prompt you to import the contacts. Confirm the import, and your contacts will be added to your iPhone.
Security and Privacy Concerns
As you transfer your contacts, it’s essential to consider security and privacy. Here are some tips to protect your contacts during the transfer:
- Use Trusted Methods: Stick to trusted methods like using Google, iCloud, or well-known third-party apps for contact transfer.
- Avoid Unverified Apps: Be cautious when using unfamiliar apps, as they may compromise your data security.
- Regularly Update Passwords: Ensure your Google and iCloud passwords are strong and regularly updated for added security
Alternatives to Contacts Transfer
If you prefer not to transfer your contacts or want to access them without moving them to your iPhone, consider these alternatives:
- Access Contacts via Apps: Use apps like Gmail or Outlook to sync and access your contacts across devices without transferring them.
- Cloud-Based Solutions: Store your contacts in a cloud-based service like Google Contacts or iCloud Contacts and access them from any device.
Conclusion
Transferring contacts from Android to iPhone is a crucial step when switching devices. Your contacts represent valuable connections and information that you don’t want to lose. By following the methods outlined in this guide, you can ensure a smooth and hassle-free transfer process. Whether you choose to use your Google account, iCloud, a third-party app, or manual entry, you now have the knowledge and tools to make the transition seamlessly.
Frequently Asked Questions (FAQs)
Yes, you can transfer contacts without an internet connection by using methods like exporting contacts as a VCF file and transferring it manually.
No, transferring contacts from Android to iPhone does not delete them from your Android device. It creates a copy on your iPhone while keeping the original contacts intact on your Android.
The transfer time varies depending on the number of contacts and the chosen method. In most cases, it takes only a few minutes.
Transferring contacts through trusted methods is generally safe. However, be cautious when using unfamiliar apps, as they may compromise your data.
Yes, some methods allow you to transfer other data like photos, videos, and messages in addition to contacts.
Once contacts are transferred, it’s challenging to undo the process. It’s essential to double-check everything before proceeding.
Read More…
- How to Lock Apps on Your iPhone for Enhanced Security
- How to Clear Cache in iPhone: A Step-by-Step Guide to Boost Performance
- How to Set a Custom Ringtone on Your iPhone
- How to Screen Record on iPhone: A Step-by-Step Guide
- How to Hide Apps on iPhone: Your Ultimate Guide
- How to Transfer Photos from iPhone to Laptop: A Comprehensive Guide
- The Ultimate Guide: How to Record Calls on iPhone
- How to Switch Off iPhone: A Comprehensive Guide
- Charging on a Budget: Top 5 Affordable High-Quality iPhone Cables
- How to Transfer Data from Android to iPhone: A Comprehensive Guide
- How to Restart Your iPhone: A Comprehensive Guide to Troubleshooting
- How to Take a Screenshot on iPhone: A Step-by-Step Guide
Explore the latest iPhone accessories and essentials on Amazon!
Whether you’re in need of protective cases, high-quality headphones, or innovative charging solutions, you’ll find a wide range of options to enhance your iPhone experience. Shop now to discover top-rated products that complement your iPhone, and take advantage of exclusive deals and offers. Click here to browse the best iPhone accessories on Amazon and elevate your smartphone game!
Please note that if you decide to make a purchase through this link, I may earn a small commission at no additional cost to you.
“Thank you for your support!”
